Featured on 80 Level - Journey to Houdini Mastery: VFX Breakdown
- Rahul Gupta
- Feb 10, 2024
- 14 min read

I recently had the honour of interviewing with 80 Level. In the article, I go over why Houdini and Unreal Engine are the future, working in the industry after Gnomon, the importance of learning compositing, the use of Karma engine in my projects, and much more!
Read the article here!

The article is also available below -
Introduction
I’m Rahul, also known as Arctiem, an FX artist based in Miami, Florida. I am a recent Gnomon School of Visual Effects graduate working as an FX TD at EDGLRD. I grew up obsessed with music, art, and the cosmos. Having spent most of my childhood in Malaysia, I was constantly exposed to other cultures and their arts, which played a massive role in my pursuit of a career in the arts field.
At Gnomon, I was recognized with four best-of-term awards, notably for Demolition, Fluids, and Pyro categories. I was also awarded Rookie of the Year Finalist in 2023. My expertise lies in creating photorealistic effects using Houdini and implementing simulation and procedural pipeline workflows for cinematic shot production. Beyond Houdini, I have honed my skills in Unreal Engine, Nuke, and various other software to push the limitless potential of visual storytelling.

Right now, I'm proud to be a part of the dynamic team at EDGLRD, a Miami-based art, design, and entertainment studio founded by filmmaker Harmony Korine. One of our recent commercial projects involved creating visuals for a Boiler Room set as part of Miami Art Basel, known as North America’s most comprehensive international contemporary art fair. It's exhilarating to contribute to such iconic events where people from all over the world converge to witness spectacular works of art.

In addition to my current position, I've gained valuable experience through various internships and freelance work in 3D Artist, Video Editor, and 3D Animator roles. During my internships, I had the opportunity to take on a range of responsibilities, including animating and rendering 3D characters for an AR/VR app, handling scene setup for an architectural visualization company using Unity and Vray, editing videos for event promotions, and even animating a 3D character mascot for a theme park based in Beijing, China.
Galactic Battle – Karma XPU
The most recent project that I've completed, Galactic Battle, is a large-scale battle scene. It is rendered in Karma XPU inside Houdini, composited in Nuke, and color-graded in DaVinci Resolve.
Responsible for all aspects except models for ships and mountains.
Before starting the ideation process, I knew I wanted to do a project with an enormous sense of scale and many explosions. This vision was sparked by the stunning cinematography and dynamic camera movements I saw in a 2014 Dreadnought trailer on Vimeo. With this inspiration in mind, I started dissecting and planning my shot and blocking out and flipbook possible camera angles, motions, tracks, and dollys for the scene I wanted to create.

I made weekly progress and spent the first 3 to 4 weeks getting the shot's timing, motion, and camera movement just right. After I was happy with how the block out of the scene looked, I created the actual explosions. One explosion combined an initial burst plume, smoke trails, shockwave, embers, and debris, and I had to do 6 of them of varying sizes and shapes.
To create a library of explosions that I could pick and choose from, I decided to wedge some parameters and create massive flipbooks of different explosions to fine-tune and pick and choose what explosions looked the best.
After wedging every day for almost 2 weeks and getting to the best possible explosion shapes by eliminating and keeping the best attribute values, I started to lookdev the explosions inside of a LOP network in Houdini. I used the Pyro XPU Preview node to shade the explosions.
The early blackouts were a good way to previsualize the placement of the explosions and the tracers that would be causing the explosions. Much of my project took shape in this phase because I constantly moved models and stuff around, changing the backgrounds, playing with focal lengths, etc.


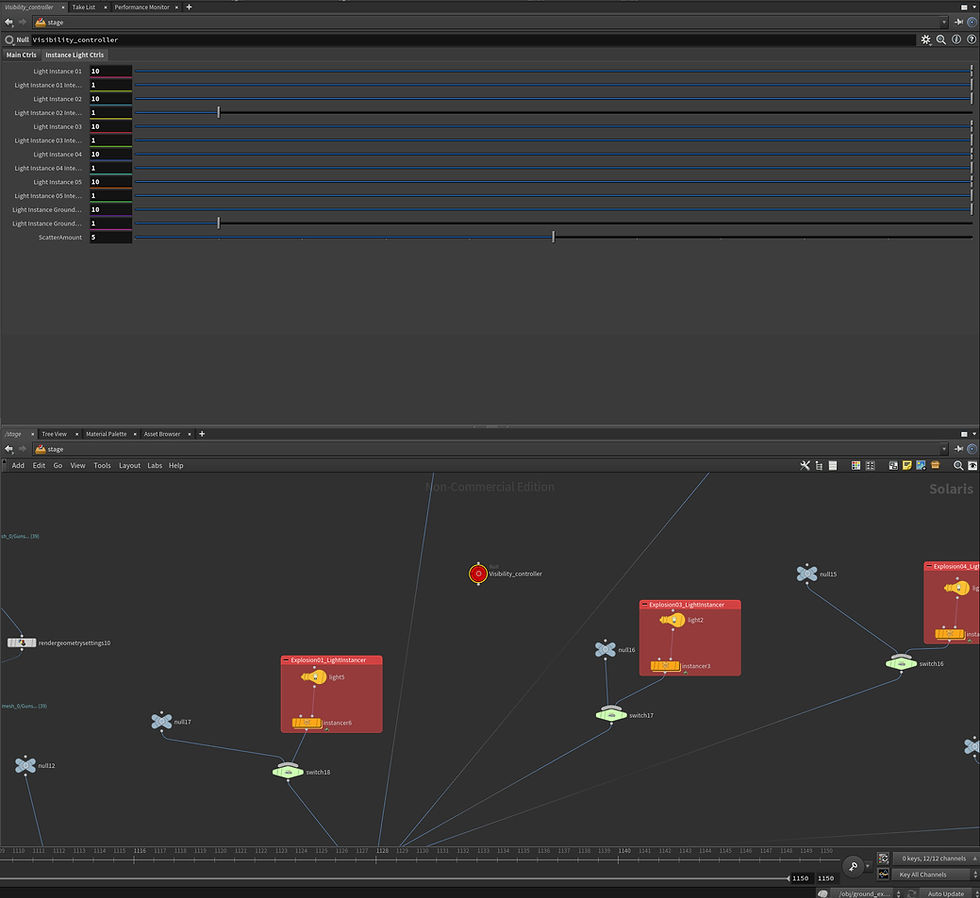
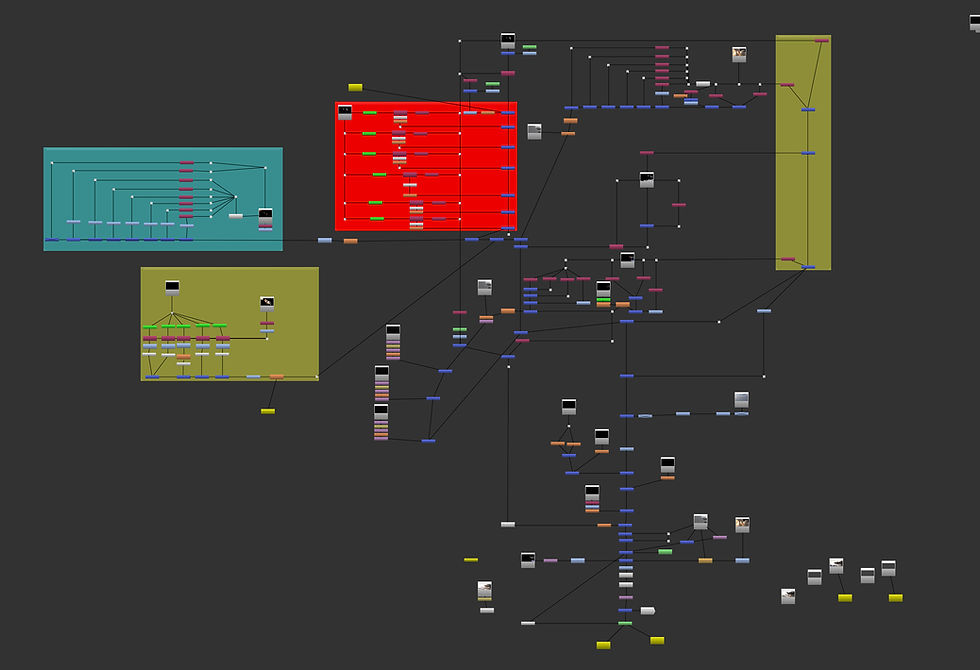
Here's my LOPnet. I designed a specialized controller to seamlessly toggle the geometry's visibility as required when rendering various layers with mattes.

My custom controller streamlined my workflow by allowing quick adjustments for light intensity, quantity, scattering, and toggling elements like explosions and fog.
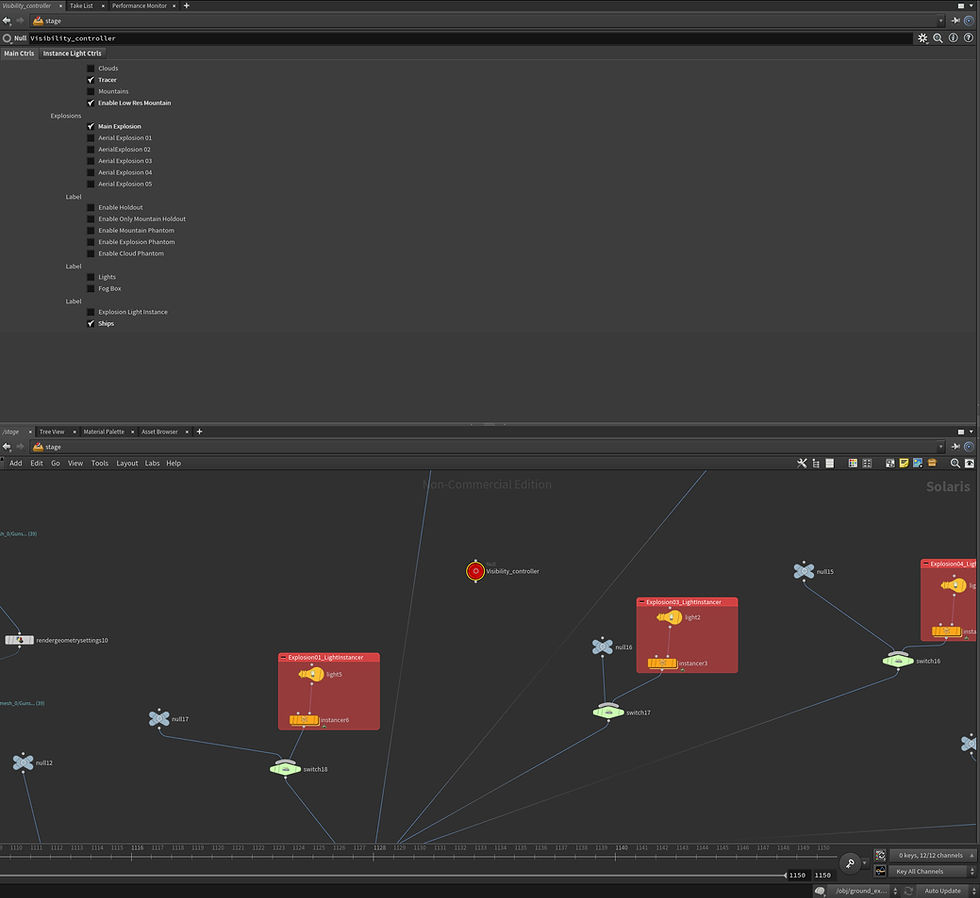
It included a proxy mode to switch between high-polygon and lighter meshes for easier scene navigation, which is especially useful during troubleshooting.
Compositing
When I'm compositing with Nuke, the initial step involves setting up my workspace, which includes defining the video's resolution and the color space. I prefer working with the ACES color management system for all my projects.
In Nuke's project settings, I set my color management to OCIO under the color tab and configured it to the latest ACES OCIO version, ACES v1.3. This setup is crucial for maintaining consistent color quality throughout my projects.
For those interested in using ACES, it's available on its official GitHub page.

In my compositing workflow, I render out different EXRs as distinct layers, each designed to isolate and highlight other layers. Among the AOVs (Arbitrary Output Variables), I consider a few essential and always make sure to export. These key AOVs are pivotal in refining the final look, allowing for nuanced control and depth in the composite imagery. Some key AOVs are but not limited to:
Beauty
Diffuse
Reflections
Emission (Depending on the shot)
Volume
Z-depth
Cryptomatte or Puzzle Matte

Once I have these AOVs, I prefer to deconstruct them in Nuke using the shuffle node. This approach grants me precise control over each scene element. I can fine-tune various components — brightening reflections, toning down emissions, deepening shadows, and more. Like in Houdini, every operation and node in Nuke serves a distinct purpose.
When it's time to bring it all together, I blend the layers. Integrating specific AOVs might initially seem intricate, but a Plus or Over operation is typically my go-to.
Don't expect every output from Houdini to match your vision perfectly, which is why mastering compositing is crucial. While Houdini sets the stage for initial visuals, it's just the beginning.
The true magic unfolds in the compositing phase, where tools like Nuke come into play. You can fine-tune colors, aesthetics, and overall ambiance here, transforming good visuals into professional-grade masterpieces. In this phase, your creative prowess truly shines, elevating your work to new heights.
If you share my passion for crafting intricate, interwoven networks of image sequences intricately flowing through a myriad of nodes, then you'll likely find this aspect of FX shot production exhilarating. With its complex and interconnected nature, this process could easily become the highlight of your work in visual effects.
Color Grading
After exporting my scene from Nuke in ProRes format, I shifted gears to color grading in Davinci Resolve. I always turn to Davinci for those final touches and to get the look just right.
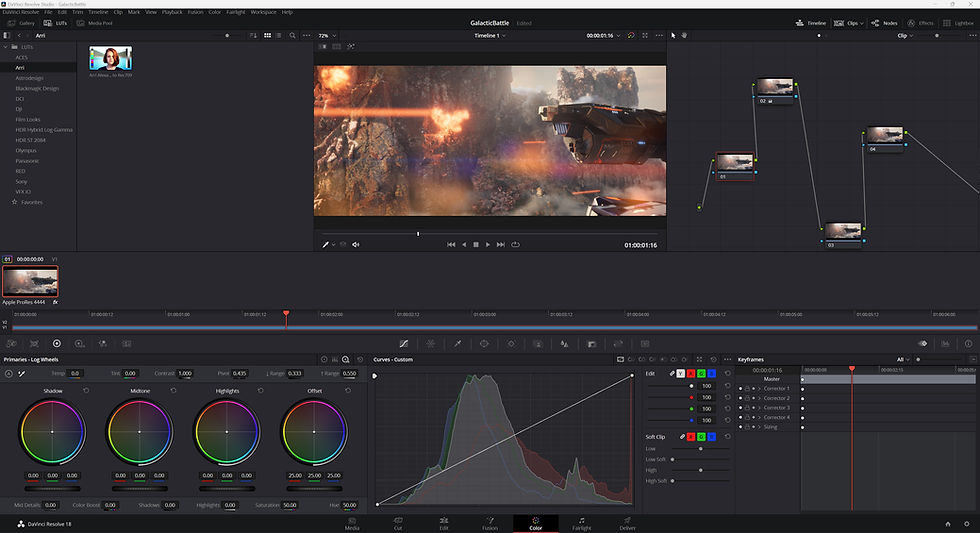
Once the scene was imported into Davinci, I tested different LUTs (Lookup Tables) to see how they worked with my footage. But instead of sticking with a preset LUT, I gravitated towards manual color grading using the color wheels.
The color wheels in DaVinci are fantastic for fine-tuning. They give you much control over the influence of shadows and highlights on the colors, letting you adjust even the smallest color shifts.
Next up, I tackled masking. Usually, I'm pretty conservative with masking since it's not a procedural way of color grading. However, some masking can work wonders when a shot is almost perfect, at about 99%. It's great for popping the contrast in areas that need a bit more drama or toning it down in spots where I don't want the viewer's attention to linger too long. It's all about finding that balance and making the image pop just right.

The final step in my color grading process is adding subtle yet impactful finishing touches, like camera shake and optical effects.
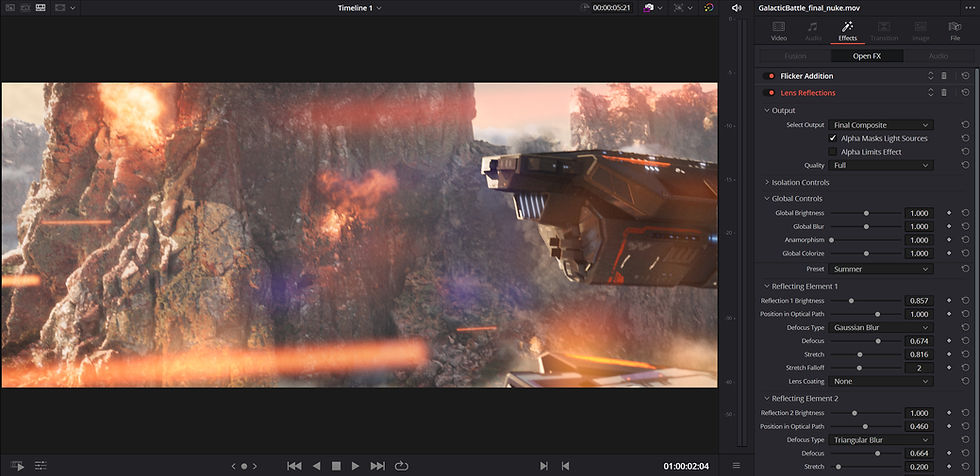
For this particular project, I chose a low-frequency, low-intensity flicker filter. This little trick is meant to mimic the effect of sunlight constantly changing its angle on the camera lens. It's one of those details that might go unnoticed by most, but for me, it's crucial. It adds a layer of realism and depth that I just can't ignore, especially after spending so long fine-tuning every aspect of the shot. And on the off chance someone does pick up on these subtle elements, it feels great knowing they appreciate the attention to detail.
Additionally, I introduced a lens reflection filter. I manually adjusted the intensity of the reflections, cranking it up when laser beams swooped close to the camera and dialing it back when they moved away. This technique enhanced the lens flare effect you'd expect from laser beams flying near the camera. These small, thoughtful additions really bring the scene to life.
Small Waterfall – Karma XPU & CPU
I've always been fascinated by the idea of creating a waterfall, and this project was the perfect opportunity to bring that to life. For the water and whitewater elements, I used Karma CPU, while all the other geometry was rendered with Karma XPU. It was a unique chance to blend my technical skills with my creative vision, aiming to create a visually appealing, inviting, and tranquil piece.
I drew inspiration from the real world for this project, specifically focusing on a few small waterfalls nestled in forest environments. What caught my eye was these places' natural, unrefined beauty. I was particularly drawn to the murkiness of the water – its green tint and muddy appearance, surrounded by wild vegetation. It had this untouched, wild look, free from any human alteration.

Once I had a clear vision of the look I wanted to achieve, I began shaping the environment. I started with basic shapes to get the layout right and then gradually replaced these placeholders with more detailed megascan assets.
After this initial low-resolution setup, I focused on planning the camera motion. Once the camera path was locked in, I dove into working on the FLIP simulation, bringing the dynamic movement of water to life in the scene. This process was all about capturing that raw, natural essence I was so inspired by.
While working on the FLIP simulation for the waterfall and river, I encountered some intriguing challenges. I decided to simulate the waterfall and the river on the ground as two separate FLIP simulations. This approach allowed me more control over their respective behaviors and gave me the flexibility to increase the resolution of each simulation independently, as needed.
However, this method brought about a tricky issue. There was a noticeable seam at the point where the waterfall's water met the base river. I needed to generate fake splashes at this intersection to create a more seamless and natural transition.
I introduced an additional FLIP source right beneath the seam to tackle this. I then applied a custom velocity field to this source, directing it upwards and adding a lot of noise. This technique effectively created the illusion of splashes occurring as the waterfall's water hit the river, blending the two separate simulations into a cohesive, dynamic water scene.

I set up materials in Houdini's stage context once everything was prepped and primed for rendering. I dove into Solaris to render the entire sequence, layer by layer. I strategically used Karma XPU and Karma CPU for different parts of the process, leveraging each for their specific strengths.
I opted to render the whitewater using the CPU because Karma XPU was still in beta (Houdini 19.5) and didn't fully support reflections on volumes – a crucial feature for rendering realistic whitewater. I also rendered the water on the CPU, as XPU then had limitations in handling opacity.
Working with USD (Universal Scene Description) throughout this process was both enlightening and extremely beneficial. It's clear why the industry gravitates towards USD as a standard. It provides a versatile framework that enhances workflow efficiency and compatibility, which is invaluable in bringing this project to life.
One challenge I faced was dealing with the graininess in the renders from Karma XPU. To tackle this, I employed the aiDenoiser in Houdini's COPs (Compositing Operators) before exporting to Nuke. This tool proved invaluable, allowing me to reduce the noise, utilizing the Normal and Albedo passes to ensure a cleaner, more polished final image. This step was crucial in achieving the high-quality, seamless look I aimed for in the final composition.

After rendering all the layers, I shifted gears to compositing them together in NukeX. This stage involved a lot of detailed work – grading, adding glow to specific parts, and using crypto mattes to fine-tune colors and lighting in certain render areas.

Houdini
After graduating with a bachelor's degree, I was searching to specialize in one of the concentrations of the 3D field. My affinity, prior programming experience, and love of art landed me in an interesting dilemma. Choosing FX as a career was the best solution to this conundrum. I believe being an FX Artist entails being artistic to create compelling visuals and being technically proficient to know how to execute your creative ideas.
I believe FX is more of a jack-of-all-trades kind of role than specialized positions like character or environment design. It demands a solid grip on lighting and composition. As an FX artist, making your effects stand out isn't just about the effects themselves but also how well you can composite them. Strong compositing skills can elevate your work's look and quality, blending your effects seamlessly into the scene and making them pop in just the right way. This blend of various skills makes FX work so unique and challenging.
Tips for Beginners
There are many different sides to Houdini, it is becoming one of the most sought-after tools for grooming, lookdev, procedural modeling, and simulations. SideFX has also been expanding its domain to animation with the introduction of APEX in Houdini 20.
With so much going on, the best way to dive into the software, in my opinion, is to pick one of these domains and start by exploring what each node does and what its purpose is. Houdini is a node-based software, just like Mari and Nuke. For someone who has never worked with a node-based application, it might seem a little complex and slow at first to work this way, but you soon realize that this way of working is extremely procedural as you have a history and ability to change things up in the node chain.
Each node has its specific use case and ability to manipulate certain attributes that are driven by parameters.

Once you get the hang of this procedural node-based workflow in Houdini and some of its immense library of nodes, you can start performing specific tasks.
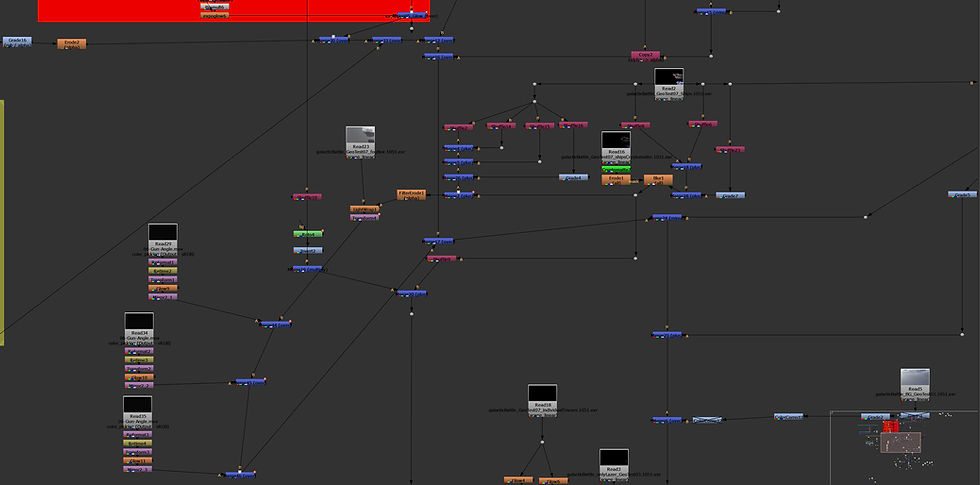
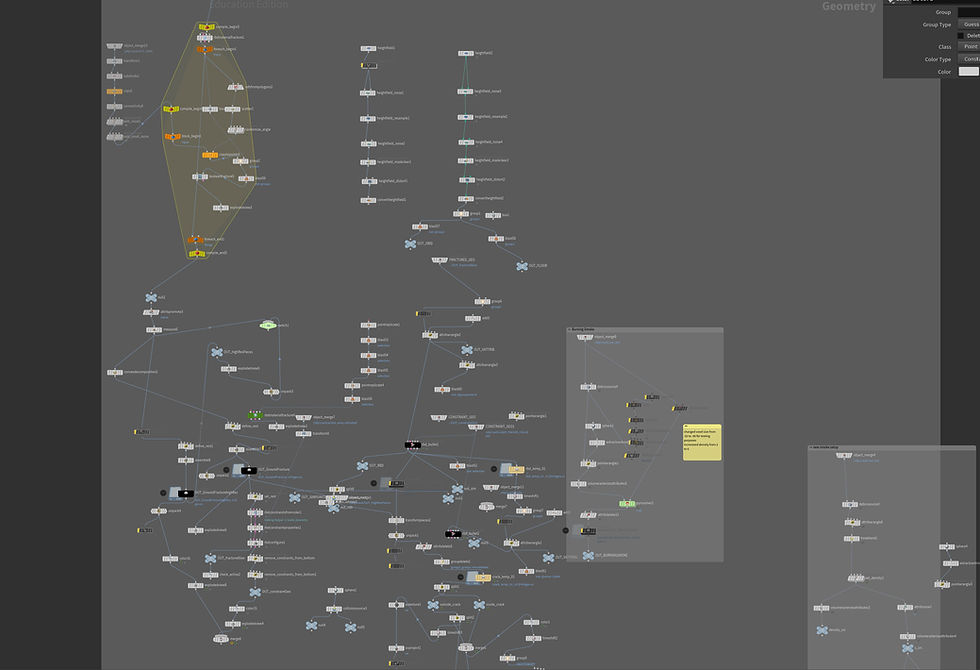
Below is an example of how complex your node graphs can look when you build FX setups. This particular setup was done to fracture a plane into a specific amount of small, medium, and large pieces and to simulate a large laser cutting through the pieces.

Once you realize the power of nodes and the operation they perform, you can start exploring the even more technical side of Houdini. VEX. VEX is a high-performance expression language used in Houdini. It is based on C++. Hence, if you have some level of experience in object programming, the concepts of using this language are not hard to understand.
Procedural Energy Setup
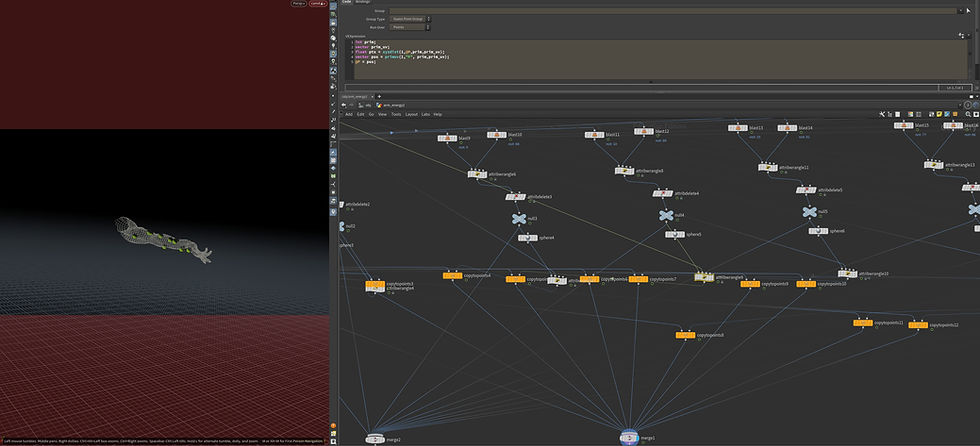
In my Witch Magic project, VEX proved to be incredibly useful, especially for one specific task. I needed a procedural system to guide spheres as they traveled along an arm, sticking to its geometry. I could have approached this in numerous ways, but I decided to employ the XYZDist and LERP functions in VEX. Here's how I used them:
XYZDist function - This was key for determining the closest point on the arm's geometry to a given position. By using XYZDist, I could ensure that the spheres followed the contours of the arm accurately, maintaining contact with the surface as they moved.
LERP function (Linear Interpolation) - This function played a crucial role in smoothly transitioning the spheres from one point to another along the arm. LERP helped create fluid movement, making the spheres journey along the arm.
This was the final shot.
One of the really good things about learning VEX is just how much more control it gives you over your geo and attributes. Luckily, SideFX has comprehensive documentation on VEX and its functions.
When I first started learning coding in VEX, I constantly had documentation open and ready to reference specific functions and concepts I struggled to learn.
I would like to highlight some resources I constantly reference and utilize to increase my knowledge of VEX:
Apart from this, SideFX has example files showing how different nodes work. It can be accessed by pressing the question mark at the top right corner of Houdini and searching for examples. After that, click Load to load the example in your current Houdini window. This is a great way to learn how the Houdini devs intended for a particular effect/operation to be done.


Karma
Karma is Houdini’s physically-based path tracer, tightly integrated with USD (Universal Scene Description). It stands to be a successor to Mantra as Houdini’s native renderer.
Over the past year, I have spent most of my time rendering my projects inside of Karma and learning how to use it.
After using it for a reasonable amount of time, I can safely say that it can compete with the likes of other renderers like Redshift, Arnold, etc. Since Karma just went gold in the Houdini 20 release, it still has some features that are on the way, but it seems extremely promising for use in a professional production environment.
With the introduction of Karma XPU, there is near real-time feedback when rendering scenes, which is essential for an iterative and creative workflow.
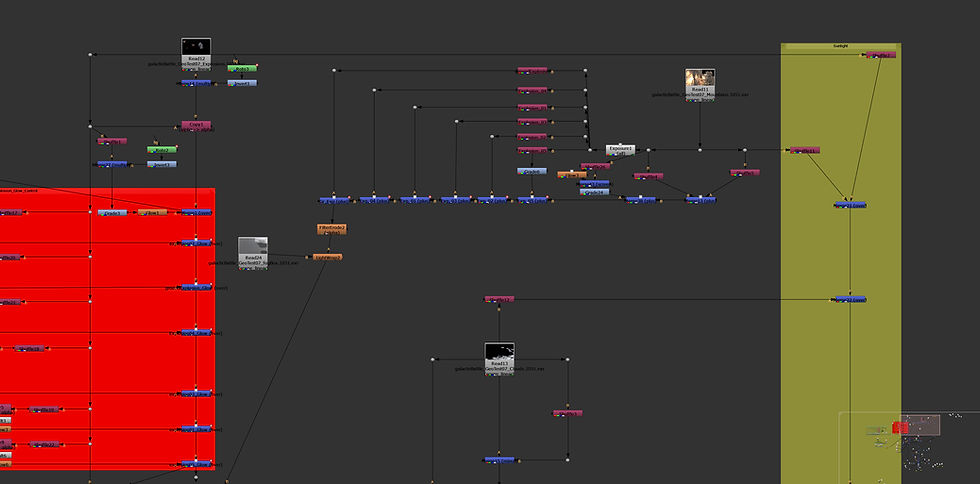
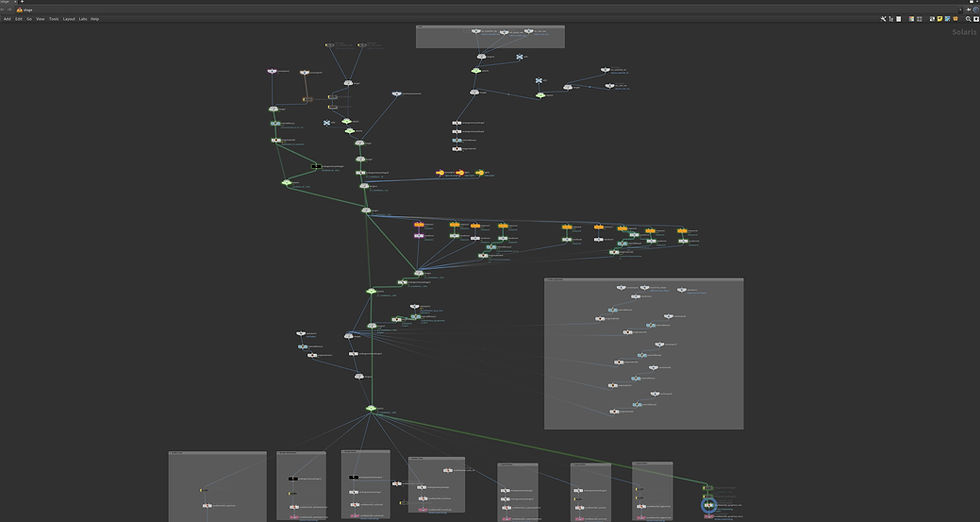
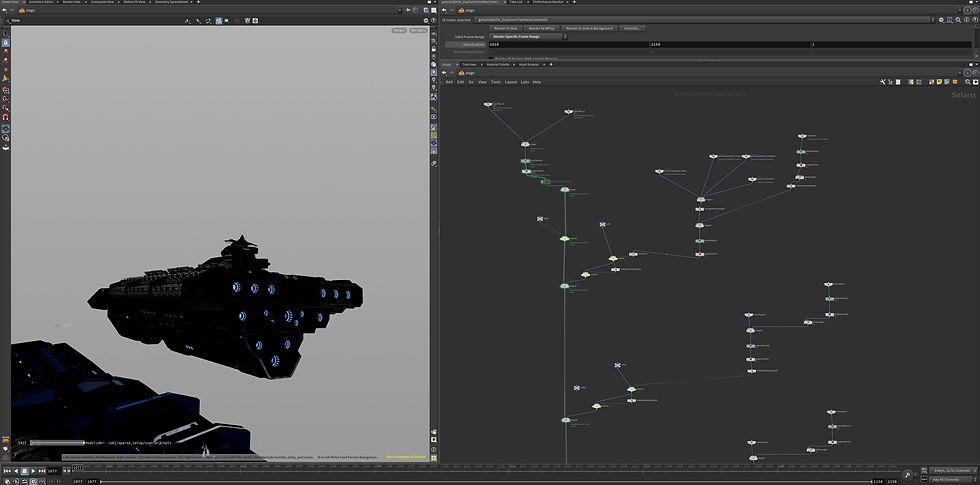
LOPs (Lighting Operators) is a framework within Houdini that allows you to work with lighting, shading, and rendering in a procedural manner when using Karma. It is used for scene assembly, procedural workflow, USD integration, Shader and material management, and Interactive rendering and lighting setups. Below is what a LOP setup can look like for a scene:

Nodes inside the LOP network are evaluated from top to bottom, just like other parts of Houdini. Hence, to see the final result, it makes sense to always check off the blue mark at the last desired node.
Having used a variety of other rendering engines inside of Houdini, I would like to pick Karma over others because:
Licensing – Since Karma is Houdini native, it does not require an external license purchase. It comes with the standard version of Houdini.
Speed – Karma is arguably one of the fastest renderers I've worked with. While the CPU version might be a bit slow, the XPU version is where the renderer really shines. I would put it up to par with Redshift regarding rendering speed.
Lens Shaders and deep integration within VOPs – Custom Lens Effects that mimic real-world camera lenses, the ability to use procedural texturing nodes in VOPs, and the ability to create complex shading networks are some integration features offered by Karma.
Learning the USD Workflow – One thing that using Karma XPU will force you to do is to start using MaterialX, the USD shading node. The industry is moving towards a single format that can be used in all applications, and having knowledge of working in USD is an extremely sought-after asset, especially in 2024.
Tips & Tricks
In my career, honing an eye for composition and scale has been a game-changer. While many artists excel technically, the creative use of these skills to create captivating compositions really sets work apart.
The bedrock of a successful artist lies in fundamental skills like color theory, shot design, and storyboarding. These are crucial, as they prevent fundamental errors from creeping into your work. Additionally, learning from experienced artists is invaluable.
Expanding my knowledge into the domain of FX in Unreal Engine has also been a game changer. With the introduction of VDBs in Unreal Engine 5.3, I believe Epic has already made a significant leap in terms of FX integration. Hence, I have spent more time learning the real-time pipeline, which we strive to do at EDGLRD.
Here is my best advice for aspiring artists and graduates:
Continuously improve your portfolio. Strive to make progress every day, even if it's small, particularly on your demo reel projects. It showcases your skills and passion, so keep refining it.
Broaden your skillset to encompass real-time VFX. Its popularity has surged, and it's becoming a critical skill in the industry. Staying ahead of this curve can really set you apart.
Seek feedback and critiques from peers and mentors. Their insights can help you polish both your current and past work. It's all about learning and growing from each piece you create.
Don't stop applying and networking. Persistence is key. Every application is a chance; every new connection could lead to opportunities. Keep building those relationships and showing your passion for the craft.
Conclusion
In conclusion, my journey as an FX artist has been a blend of continuous learning and creative exploration. Fundamental skills in color theory, shot design, and storyboarding have been the cornerstone of my growth. As I look ahead, I'm excited about the future of FX in gaming and beyond, where we can create experiences that are seen and felt.
My advice for aspiring artists is to refine their skills persistently, seek constructive feedback, and stay committed to their creative pursuits. Embracing challenges and continually expanding one's skill set, especially in areas like real-time VFX, can open up new avenues in this ever-evolving industry. I extend my heartfelt thanks to Arti for this opportunity to share my experiences and insights, and I hope they inspire others on their artistic journey.
You can check out more of my work on my website, LinkedIn, ArtStation, YouTube, and Instagram.


Comments